10 Real Estate Photography Tips to Capture Stunning Property Photos
In modern real estate marketing, buyers almost always fall in love with a property online before ever stepping foot inside. High-quality photography isn’t just a nice-to-have extra; it is the single most critical factor in driving listing views, attracting serious buyers, and securing higher sale prices.
Whether you are a professional photographer stepping into property shoots or an agent looking to elevate your listing portfolio, mastering real estate photography requires a blend of technical camera control, spatial staging, and post-processing savvy.
Here are 10 actionable, expert-tested tips to help you capture interior and exterior property photos that pop off the screen.
1. Master the Wide-Angle Lens (Without Going Distortion-Crazy)
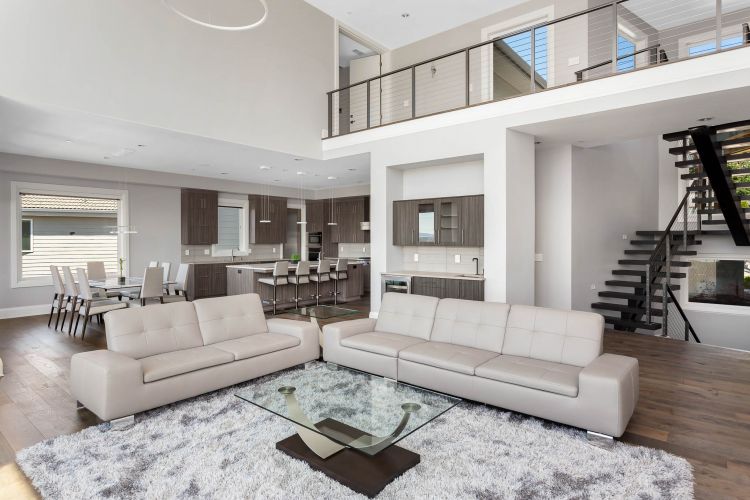
If you ask any seasoned architectural photographer for their primary tool, they will point straight to a wide-angle lens. Standard focal lengths simply cannot capture the breadth and open feel of a living room or master suite in a single shot.
- The Sweet Spot: Aim for a focal length between 16mm and 24mm on a full-frame camera (or 10mm to 16mm on a crop sensor body).
- Avoid Fish-Eye Distortion: Ultra-wide lenses under 14mm can stretch room proportions unrealistically, making walls curve and rooms look like funhouse mirrors. Keep your focal length wide enough to show context while keeping room dimensions accurate to prospective buyers.
2. Lock Down Your Height and Level Your Verticals
Nothing screams “amateur photography” faster than slanted walls or distorted door frames. Keeping vertical lines strictly straight is a fundamental rule in property photography.
- Use a Sturdy Tripod: Never shoot real estate handheld. Mount your camera on a tripod equipped with a bubble level or turn on your camera’s internal digital horizon level.
- Camera Height Matters: Position the camera at roughly chest height (4.5 to 5 feet off the ground). Shooting too high makes ceiling spaces dominant and crouches room dimensions, while shooting too low over-emphasizes furniture surfaces.
3. Conduct a Thorough Pre-Shoot Walkthrough
Before taking your camera out of the bag, spend 10 to 15 minutes walking through the property. Look at the layout, locate key light sources, and clear away distracting visual noise.
Pro Tip for De-cluttering:
- Hide pet dishes, trash cans, cables, and personal family photos.
- Smooth out bed sheets and fluff couch cushions.
- Lower toilet lids in bathrooms.
- Clear refrigerator magnets and kitchen countertop clutter.
4. Master Lighting Consistency and HDR Bracketing
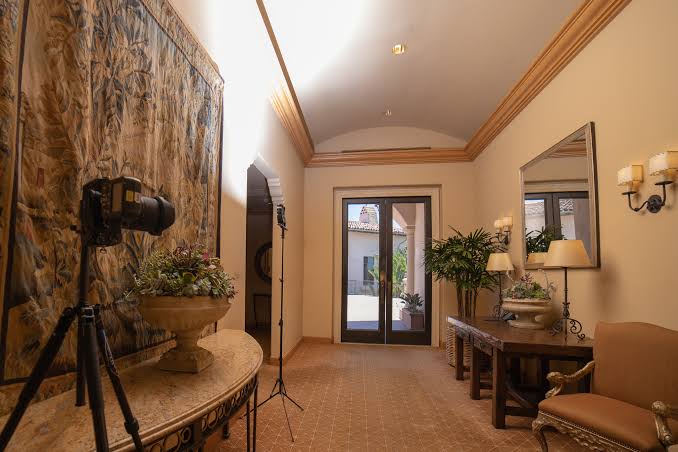
Balancing ambient indoor lights with bright sunlight pouring through windows is one of the toughest challenges in interior photography. High Dynamic Range (HDR) exposure bracketing is the industry-standard technique to solve this.
- Bracket Your Shots: Take 3 to 5 exposures of the exact same frame (underexposed for bright windows, neutral exposure for the room, overexposed for dark corners).
- Blend in Post: Merging these exposures allows both the interior decor and the lush outdoor view through the window to remain crisp and perfectly exposed.
5. Use Off-Camera Flash to Bounce Natural Light
While relying purely on ambient light can work, adding off-camera flash or speedlights brings crispness and accurate color reproduction to your interiors.
Instead of aiming flash directly at the scene, bounce light off white ceilings or walls behind or beside the camera. Bouncing diffuses harsh shadows, fills in dark spots beneath cabinetry, and brings out true wood and textile colors without creating harsh glare.
6. Frame Shots to Highlight Flow and Depth
Flat, straight-on shots of a single wall can make spaces feel boxy and small. Frame your shots from corners or doorways to showcase how rooms connect to one another.
- Three-Wall Rule: Try to include three walls in your interior frames whenever possible to create spatial depth.
- Lead the Eye: Frame photos so that hallways, kitchen islands, or patio doors create natural leading lines guiding the viewer’s eye into the image.
7. Shoot Exteriors During Golden Hour or Dusk
First impressions start with the curb appeal photo. Midday sun creates harsh shadows, blown-out roofs, and squints on windows.
| Time of Day | Ideal For | Why It Works |
|---|---|---|
| Golden Hour
(Late Afternoon) |
Front Facades & Backyards | Soft, warm sunlight flatters exterior walls and landscape features. |
| Twilight / Dusk |
Luxury Listings & Pool Areas |
Sky turns deep indigo while warm interior lights pop, creating a high-end luxury feel. |
8. Maintain Optimal Camera Settings
To keep your property photos razor-sharp with minimal digital noise, set your camera manually:
- Aperture: Keep your lens between f/7.1 and f/11. This ensures edge-to-edge sharpness across the entire room.
- ISO: Set ISO to 100 or 200 to eliminate grainy noise in shadow areas.
- Shutter Speed: Let the tripod do the work. Allow longer shutter speeds (e.g., 1/15s to 2s) to capture clean exposures without bumping ISO.
9. Maintain Landscape (16:9) Aspect Ratio Consistency
Real estate MLS systems, agency websites, and property portals are designed for horizontal landscape imagery.
- Always capture main room shots in landscape format.
- Keep aspect ratios consistent across the property set (usually standard 3:2 or widescreen 16:9) to ensure seamless viewing on desktop monitors and mobile devices.
10. Partner with Professional Photo Editing Services
Even with flawless shooting technique, raw real estate images require post-processing to reach magazine quality. Professional photo editing fixes lens distortion, balances color cast temperatures from mixed light bulbs, replaces overcast grey skies with blue skies, and performs advanced window pull blending.
Delegating your editing saves hours of tedious post-production time while delivering consistent, high-converting imagery for every listing.
Elevate Your Property Listings Today
Ready to transform your raw shots into high-converting property imagery? Learn more about professional editing, sky replacement, and exposure balancing at https://www.colourcubz.com/real-estate-photo-editing-services.