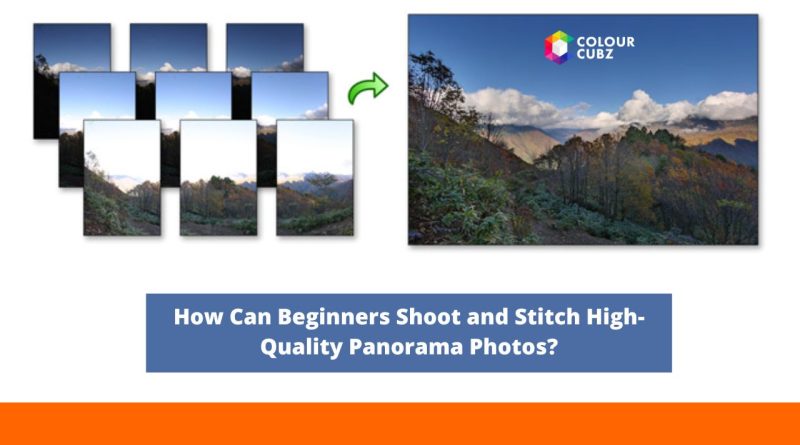
How Can Beginners Shoot and Stitch High-Quality Panorama Photos?
Panoramic photography offers an exciting opportunity to capture wide, breath-taking scenes that go beyond what a standard camera frame can contain. Whether you want to showcase a sweeping mountain range, a luxurious interior, or a bustling city skyline, panoramic images allow you to share the full scope of a scene in vivid detail. While the process might appear technical at first, beginners can absolutely learn how to shoot and stitch high-quality panoramas with the right guidance and practice. This guide breaks down every step and essential tip to help you create professional-looking panoramas – no matter your experience level.
What is Panorama Photography?
Panorama photography involves capturing multiple overlapping photos of a scene and merging them into one wide-angle image. This method enables photographers to overcome the limitations of single-frame shots and showcase expansive views. By stitching several images together, you can present a fuller picture of your environment, whether it’s a vast outdoor landscape or a compact indoor space. Panoramas can be horizontal, vertical, or even spherical (360-degree), depending on how you shoot and stitch them. This style is widely used in travel photography, real estate, architecture, and virtual tours. It also offers great creative freedom and storytelling opportunities for photographers.
Essential Gear for Beginners
While high-end equipment can help, beginners can start panorama photography with basic yet reliable tools. A DSLR or mirrorless camera gives more control over settings, though many modern smartphones also offer decent panorama modes. A sturdy tripod is essential to ensure that each image is captured at the same level and alignment, minimizing distortions. For better accuracy, a panoramic tripod head is recommended as it rotates the camera around its nodal point to prevent parallax errors. A remote shutter release or camera timer helps avoid camera shake. Lastly, you’ll need panorama stitching to combine your photos into a single seamless image.
Step 1: Plan Your Shot
Before you even lift your camera, take time to analyse the scene you want to photograph. Identify a visually balanced composition that offers interesting elements across the frame, such as mountains, buildings, or interior design features. Check for moving objects like people, cars, or trees swaying in the wind, as these can cause ghosting issues in the final panorama. Consider the lighting and shadows – shooting during golden hour can enhance the overall appeal of your panorama. Determine whether you’ll shoot horizontally or vertically, depending on what you want to capture. A thoughtful approach leads to a cleaner, more compelling result.
Step 2: Set Up Your Camera and Tripod
Mount your camera securely on a tripod and make sure it’s perfectly level. An uneven tripod can result in distorted horizons and make stitching much harder later. Most tripods come with a built-in bubble level, which helps ensure that your camera stays straight throughout the sequence of shots. Adjust the tripod height so your camera sits at a comfortable, stable position, ideally aligned with the middle of your subject. Tighten all knobs and joints to prevent movement while rotating. Consistency is key – every small tilt or shake can affect alignment and create noticeable breaks in the final image.
Step 3: Use Manual Settings
To maintain uniformity across all shots, it’s essential to switch your camera to manual mode. Automatic settings may change exposure or focus between frames, leading to visible inconsistencies in lighting and clarity. Start by locking in your aperture, ISO, and shutter speed after metering the brightest and darkest parts of the scene. Next, set your white balance to a fixed setting like “Daylight” or “Cloudy” instead of leaving it on Auto. Lastly, use manual focus to lock in on a central subject or point of interest. These manual settings ensure that all photos look consistent and are easier to stitch together.
Step 4: Overlap Your Shots
Each photo in your panoramic sequence should overlap the previous one by at least 20% to 30%. This overlap allows stitching software to find common reference points and align your images accurately. You can achieve this by slowly rotating the camera horizontally (or vertically) between shots, making sure there’s a substantial overlap of details like buildings, trees, or other patterns. Some cameras even offer guides or grids in live view to help you maintain consistent overlap. Avoid rushing through the sequence; take your time to compose each frame carefully. Overlapping is the most crucial aspect of successful stitching.
Step 5: Maintain Level and Consistent Angles
As you plan your camera from one shot to the next, it’s critical to keep the horizon straight and the camera at the same level. Tilting the camera up or down between shots can lead to a warped or “wavy” panorama, especially when shooting landscapes or architecture. Using a tripod and leveling tools can significantly reduce this risk. Consistent angles help the stitching software line up elements like the horizon, rooftops, and walls more accurately. If you’re shooting handheld, try to hold the camera as steady and level as possible. Taking care here saves a lot of post-editing time later.
Tips for Shooting Better Panoramas
To enhance image quality, shoot in RAW format if your camera allows it. RAW files retain more data than JPEGs, allowing better adjustments in exposure, color balance, and sharpness during editing. Use a lens with minimal distortion – standard lenses (35mm to 50mm) are preferable over ultra-wide or fisheye lenses. Also, consider using a lens hood to reduce flare. Always check your histogram to avoid blown-out highlights or underexposed shadows. Take a few extra frames before and after the main sequence, just in case. Most importantly, practice often. With each shoot, you’ll refine your technique and produce better results.
How to Stitch Panorama Photos
Once your photos are ready, import them into a panorama stitching software like Adobe Lightroom, Photoshop, PTGui, or Hugin. These tools automatically detect overlapping areas and align your shots seamlessly. Start by selecting all images in the sequence and choosing the “Merge to Panorama” or similar option. Review the preview for alignment errors or mismatches, and manually adjust control points if necessary. Use auto-blend and exposure correction features to ensure consistent lighting. Crop the final image to remove rough edges. Export the stitched panorama in high resolution, ready for sharing, printing, or showcasing in your portfolio.
Common Challenges and How to Overcome Them
Beginners often face a few challenges when learning panoramic photography. One common issue is parallax, where objects in the foreground and background misalign. This usually happens when the camera rotates around the tripod mount instead of the lens’s nodal point. To solve this, use a panoramic tripod head. Another issue is ghosting, caused by moving subjects like people or cars. You can avoid this by waiting for still moments or using masking tools during stitching. Exposure inconsistencies also occur when Auto mode is used – manual settings help eliminate this. Lastly, software glitches may arise, so always update your stitching tools.
Shooting 360-Degree Panoramas
For those looking to create fully immersive environments, 360-degree panoramas are the next level. These involve capturing multiple rows of overlapping images to cover the entire field of view – horizontally and vertically. Such panoramas are widely used in virtual reality (VR), real estate tours, and interactive product presentations. The process requires precise rotation around the nodal point and consistent exposure across all images. Specialized equipment and software are often used to achieve accurate results. Although it’s more complex than standard panoramas, the outcome is highly engaging and can offer a unique visual experience to viewers.
Why Choose Professional Panorama Stitching Services?
While creating your own panoramas is rewarding, achieving flawless, professional results often requires advanced skills and tools. This is where professional panorama stitching services come in. Experts can correct alignment errors, color mismatches, exposure gaps, and lens distortions that are hard to fix manually. Whether you’re a real estate agent, photographer, architect, or travel blogger, outsourcing the stitching process can save time while enhancing quality. Professionals also use high-end software and follow best practices to deliver panoramas that are ready for commercial or presentation use. When precision and impact matter, expert services are your best bet.
Elevate Your Panorama Projects with ColourCubz
If you’re looking for exceptional quality and consistency in your panoramic photography, look no further than ColourCubz. We specialize in 360-degree panorama stitching services tailored for photographers, real estate professionals, e-commerce businesses, and virtual tour developers worldwide. Our expert team uses advanced stitching software and post-processing techniques to ensure your panoramic images are flawless, immersive, and captivating.
From multi-row 360° panoramas to wide-angle single-row stitching, we handle every project with care and creativity. Whether you’re capturing a luxury property, an outdoor resort, or an event space, we transform your photo sequences into powerful panoramic experiences.
✅ Fast Turnaround
✅ Competitive Pricing
✅ Precise Stitching and Enhancement
✅ Global Delivery with 24/7 Support
👉 Turn your panoramic vision into reality.
Visit: www.colourcubz.com/360-degree-panorama-stitching-services